Innkeeper's 2012 Photos
Sprinter Update
.")
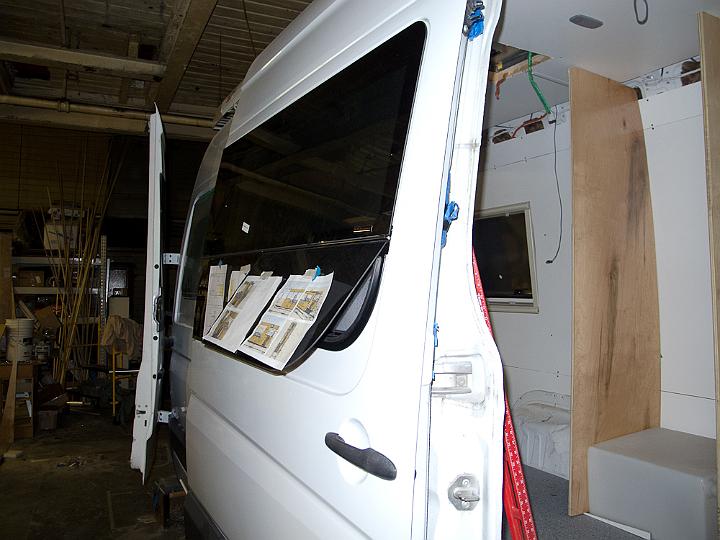
Bill drove to Asheville June 8th to check on progress in completing the Sprinter. We are pleased with the progress Robert and his team have made. In this view you can see the new passenger side windows and the awning (along the roof line -- it is a monster and should provide plenty of shade on hot days). |
 has been installed.")
The window that that will be over the galley (as in sink, cook top, and refrigerator) has been installed. |

The window in the sliding door has a small vent along the bottom for fresh air. |
|

Here's an outside view of the driver's side showing the galley window. One of the ham radio antennas will be installed on this side between the driver's door and the galley window. |

The rear window on the driver's side. There is a matching window on the opposite side. They are good sized windows with lots of viewing area. These are the same size as the windows in the van we took to Rhode Island, and we liked being able to wake up to a great view when we parked ovenight in scenic areas like Salem Harbor. |

You can see both windows in this view from the inside rear of the van. The windows open like awnings, so can remain open when it is raining. The beds will be in the photo foreground. |

A ladder and rear door windows have been added. Due to door geometry, these windows do not open. |
")
The forward section of the van roof, showing the opening for the forward roof vent and the solar panel. The solar panel and batteries should provide sufficient power for routine daily operations except for the AC and the ham radio gear. (The solar panel on the van we took to Rhode Island provided enough power for daily operations and to keep the batteries charged even with a week of cloudy days.) |

The "house" AC unit is on the roof behind the solar panel. |

The opening for the rear roof vent. |

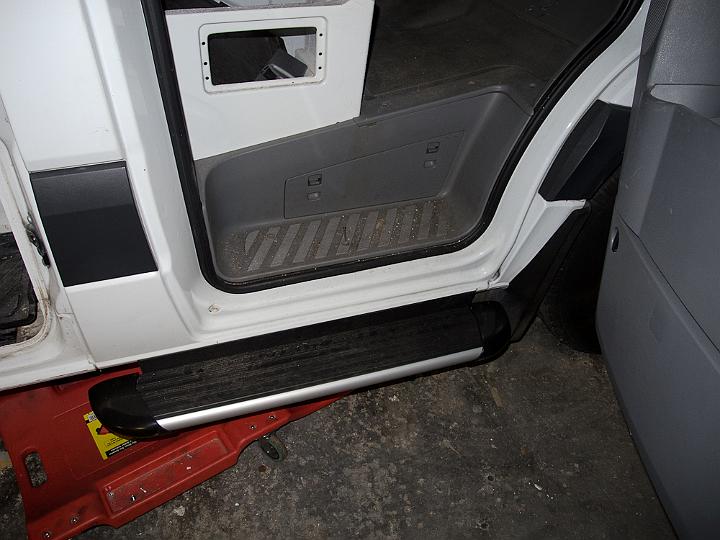
The passenger side step -- Jan had trouble getting in and out of the van we used for the RI trip -- this should help. |
|
 that will be at the foot of the bed (we will sleep with our heads toward the rear doors). The corrugate box contains a power inverter (converts the van's DC power into AC power for the microwave, hair dryer, curling iron, et cetera). It will be installed under one of the beds.")
The view into the rear of the van showing the full height closet (left side) that will be at the foot of the bed (we will sleep with our heads toward the rear doors). The corrugate box contains a power inverter (converts the van's DC power into AC power for the microwave, hair dryer, curling iron, et cetera). It will be installed under one of the beds. |

The view from the passenger seat toward the rear of the van. The cables hanging from the ceiling will distribute power to and from the house batteries that will be located beside the wheel well. The wood to the right is the full height closet. Storage cabinets will be installed where the roof and side walls meet on both sides of the rear of the van, and there will be a good sized storage / toilet cabinet in the lower left foreground. |

Overhead storage cabinets will be installed in this area along both sides of the rear of the van. |

A slightly different view of the rear of the van. The small grey box on the right side wall close to the rear door is the power panel for the AC unit. |

A better view of the full height closet. The gray box at the base of the closet is the 25 gallon fresh water tank. |

The area above the water tank will be used for hanging clothes. |
, a refrigerator, a sink, a cook top, storage, and ham radio gear. The vertical panel to the right of the gally will be moved ~6\" to the right when it is installed.")
The galley will be in this area. It will include a microwave (in an overhead cabinet), a refrigerator, a sink, a cook top, storage, and ham radio gear. The vertical panel to the right of the gally will be moved ~6" to the right when it is installed. |

A different perspective of the galley area. The white structure in the lower right of the photo is the driver's seat base. |

The combo cooktop and sink with the lids closed. |

... with the lids open. |

Driver and passenger seat bases. Both seats will swivel so we can use them for seating when we are camping. |

One of the taillight lens was cracked, so Robert's team replaced both of them for us. |

The wood box to the right of the rear tire is a mock up of the hot water heater and house heater. |

It will be installed between the spare tire and the rear axle. |

The grey water tank will be installed underneath the van. |

Inside view of the van ceiling. The round black things are speakers. |

Wiring for the AC. |

Interior sub flooring. John, I believe this is the coating you used in your basement. It will be covered with carpet tiles, similar to those used in the Atlanta Airport. |

We're really looking forward to wrapping up this project and hitting the road!! |
June 8th